
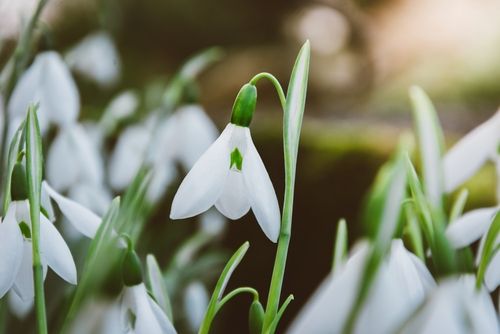
Sweet SNOWDROPS of Spring
I have been entranced by Snowdrops since I was a child in Germany and our parents showed us the tiny little blossoms pushing their way up through the snow. Could anything be more sweet and delicate?

Hans Christian Anderson described them perfectly in this excerpt from “The Snowdrop”:
“Welcome, welcome!” sang and sounded every ray, and the Flower lifted itself up over the snow into the brighter world.
The Sunbeams caressed and kissed it, so that it opened altogether, white as snow, and ornamented with green stripes.
It bent its head in joy and humility.
“Beautiful Flower!” said the Sunbeams, “how graceful and delicate you are!
You are the first, you are the only one!
You are our love! You are the bell that rings out for summer, beautiful summer, over country and town.
All the snow will melt; the cold winds will be driven away; we shall rule; all will become green, and then you will have companions, syringas, laburnums, and roses;
but you are the first, so graceful, so delicate!”
The first time I noticed Snowdrop patterns on China was on this Victorian era plate with “Flow-Blue color” set Made by Shelley Foley Company in the 1870’s and I was smitten.
A vibrant German Nymphenburg Demi-tasse set

An exquisite Flora Danica Luncheon plate

And a Victorian era c.1880’s Minton’s tile from the “Spirit of Flowers” series. One of my favorites.

Enjoy SPRING!

Happy Huckleberry Cobbler – Gluten Free

This has been the year of the HUCKLEBERRY for me. How can a berry tinier than a blueberry have such an amazing flavor and work well in almost any dessert that works with fruit? To make them even more irresistible, they are very high in Vitamin C and antioxidants and have a sweet/tart flavor… a great reason to find a way to eat them every day.


I have used them in jam, breads, waffles, bars, pancakes, pies, crisps,muffins and sauces and absolutely love them.
Where on earth can you buy a Huckleberry? My new favorite online gourmet Berry and Fruit supply is Northwest Wild Foods. They stock all sorts of wild and organic frozen fruits and berries and I now have the freezer in the garage stocked with Sour Cherries, Marionberries, red and blue Huckleberries, Rhubarb, Strawberries, Currants and Blackberries so I can create my favorite desserts and jams year round. They deliver safely packed in dry ice. Just order enough and they pay the Fed Ex shipment.
Here is what a Huckleberry looks like compared to a Blueberry:
If you don’t need to bake gluten free just use your favorite topping for your crisp or cobbler.
I found this fun recipe for Huckleberry Cake in a Victorian Era book called Mrs. Beeton’s Book of Household Management if you ever want to try it:


Here is a very good cobbler recipe. The topping is best right around 30 minutes out of the oven, still warm with a slightly crisp top crust and soft cookie like inside. If you like lots of topping, just double the recipe for the topping.
Filling Ingredients:
6 cups frozen or fresh Huckleberries or mixture of berries (Blackberries, Marionberries, etc)
1 Teaspoon Lemon Juice
3/4 -1 cup Sugar ( use higher amount if you like a sweet mixture)
4 Tablespoons Cornstarch
Topping Ingredients:
1 Cup plus 2 Tablespoons Gluten Free Flour blend ( I use Authentic Foods Classic Blend as it has no gums in it)
6 tablespoons sugar
1/2 teaspoon cinnamon
1/4 teaspoon nutmeg
1 1/2 teaspoons baking powder
6 Tablespoons Butter, chilled and cut into small chunks
1 teaspoon vanilla extract
1 large egg, beaten
1/4 chopped pecans ( optional, but the crunch is great)


Instructions:
Filling: Preheat oven to 375 degrees. Mix the filling ingredients in a large bowl and then pour into a medium saucepan and heat on medium heat until warmed. Pour into a glass or ceramic baking dish.
Topping: In a medium bowl, mix dry ingredients well and cut in butter with a pastry blender or two knives until butter is size of peas and well distributed. In a separate small bowl, whisk egg with vanilla and then add to dry mixture and just gently toss until moistened. Spoon mounds of topping all over Huckleberry Filling in pan and sprinkle Pecans over top. For extra crunch sprinkle a teaspoon of sugar on top.
Bake in oven about 30-35 minutes, until golden brown AND juices are bubbling. You can tent the top with foil if browning too fast.
Serve with Vanilla Ice Cream or Whipped Cream.

Be Charmed by Vintage China

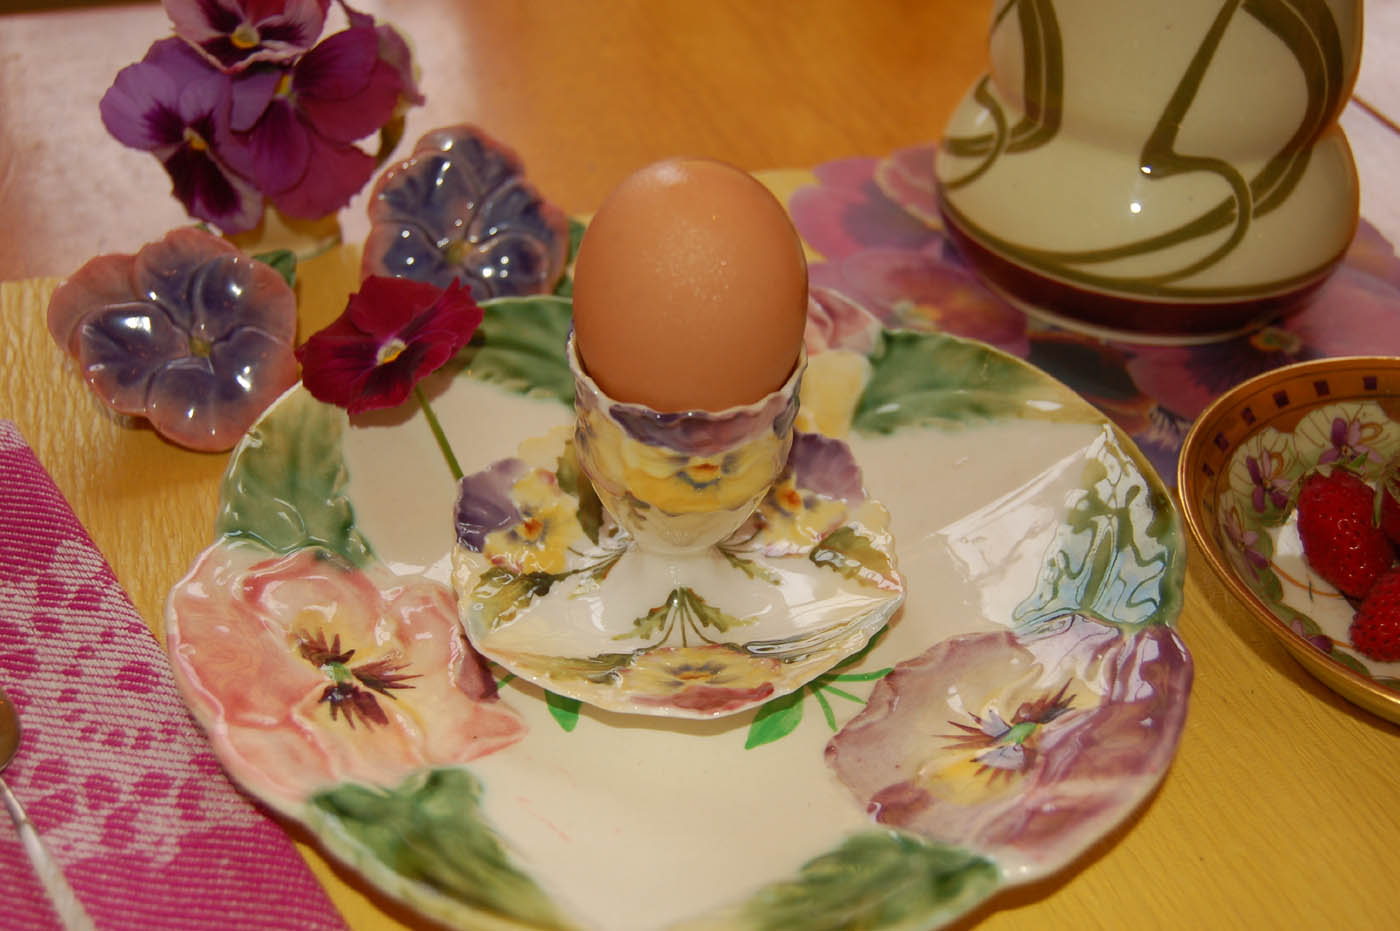
As some of you might already know, I am completely smitten by antique china and the exquisite table settings from the Art Nouveau and Art Deco eras. Can you imagine the dainty settings for tea and coffee, the tiny mocha and demitasse cups and saucers balanced on silver trays or lace covered tables? The color and depth of décor on many of the patterns I have seen are fun and beautifully hand painted or transfer decorated on to matching plates, vases, coffee pots, sugars and creamers.

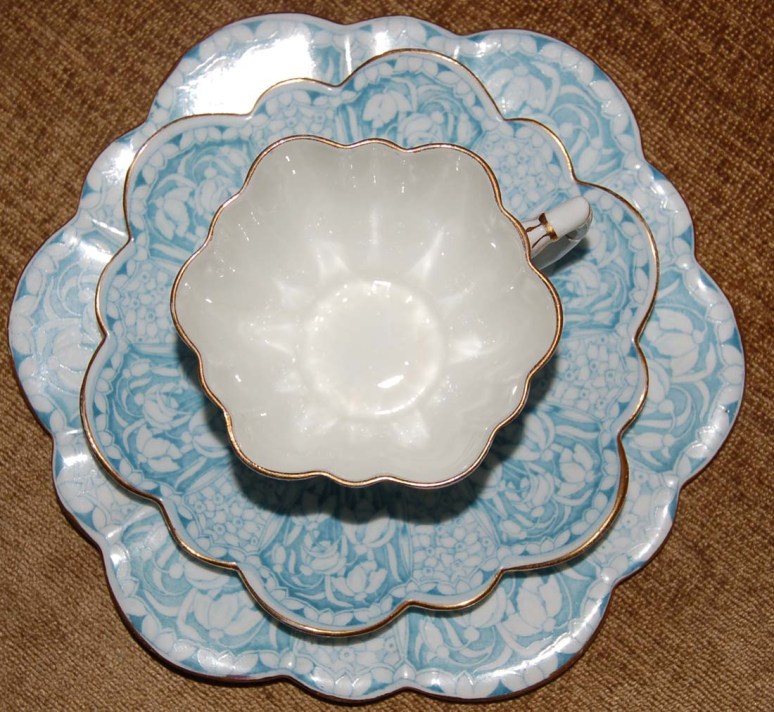
I wanted to share with you one of my earliest favorites, a c.1895-1910 Foley China (England, later was Shelley China) set in the “Fairy” shaped cup in the Snowdrop pattern. What is so exceptional is that the saucer and plate echo the scalloped shape of the cup and are rimmed in gold, which really sets off the flow-blue colored decoration.
The little vase holding the pansies and violets is a tiny hand painted demitasse cup from Nymphenburg in Germany, c.1900.

But the best news is it isn’t too late to enjoy sharing the beauty of your vintage china with a friend. Pull them out of the closet and use them often to make even your casual coffee dates more special.

Buche de Noel… A Glorious Yule Log cake for your New Year’s Celebration

Buche de Noel… a traditional French “Yule Log” cake for New Year’s Celebrations with a history that goes all the way back to the 1600’s when actual wooden logs were burned in the fireplaces during the winter solstice as a symbol and hope for prosperity in the coming seasons.
If you can make a swiss roll, then you can make this cake. I make mine gluten-free, but just bake your favorite chocolate sponge cake recipe in a jelly roll pan lined with parchment paper just until it spring back when lightly pressed in the center.
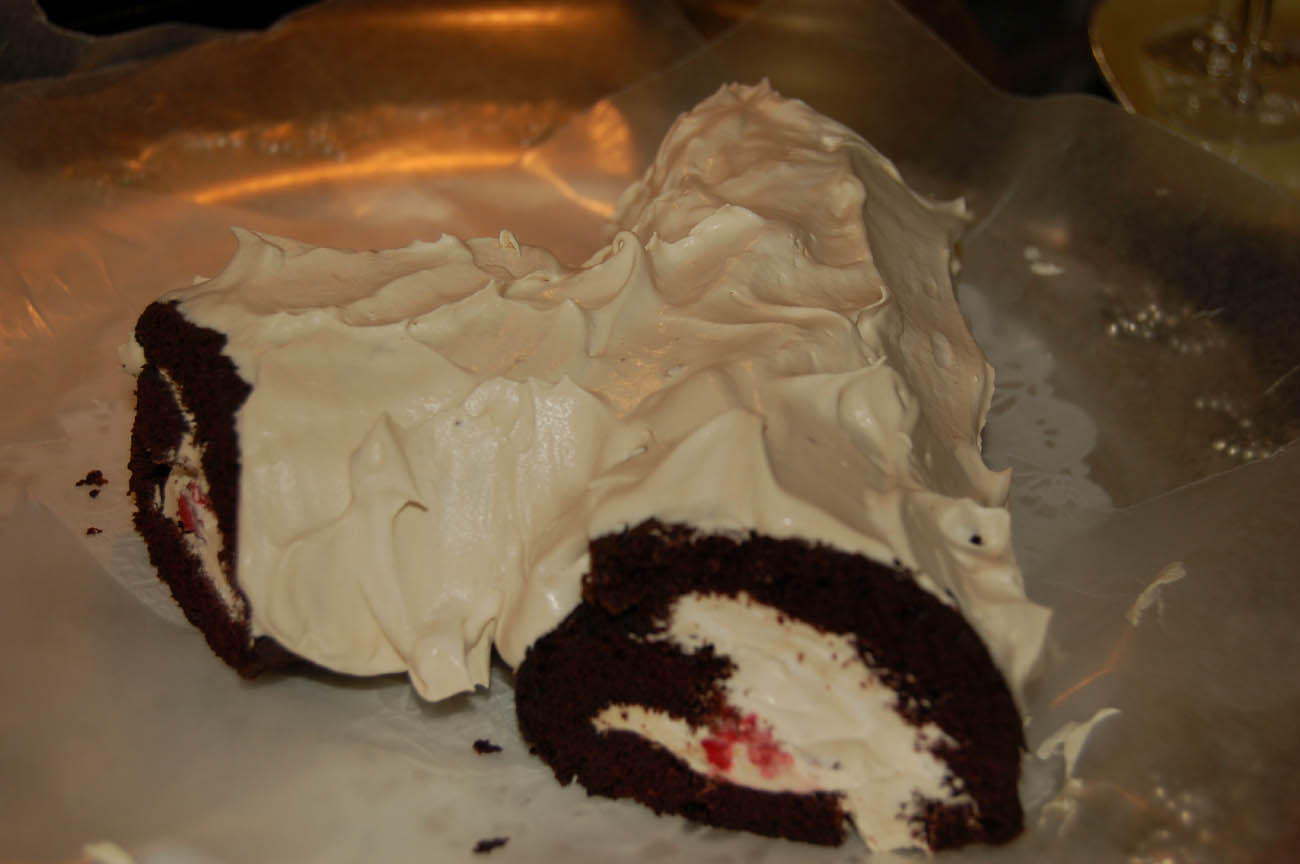
Turn cake out onto a cocoa dusted tea towel ( will be easier if you lay the tea towel on top of the cake first before flipping it out so you can guide it with your hands. Then roll gently up starting on the long side, using the towel to help roll. Let cool while you make the buttercream filling ( use your favorite vanilla or espresso flavored recipe), then fill the sponge and roll back up. Make a slice at an angle ( see image below) and place on the side of the log.

Frost with lightly sweetened whipped cream.
Make your Chocolate bark by melting dark or milk chocolate in a double boiler and then spreading the chocolate on a piece of parchment paper. After it sets slightly, roll up the parchment and freeze for a few minutes. When you unroll the parchment, the chocolate will break in long “bark” pieces that you will decorate your cake with. Chill the cake at this point.


For the meringue mushrooms, you will make a batch of meringue ( same recipe as for a pavlova or crisp meringue cookie) and pipe two different shapes. One a round smooth cap ( smooth with a spoon if you need to) and the other a tall thin stem. Bake according to meringue cookie recipe at a low temperature so they don’t turn brown. When crisp, remove from oven and cool.


To assemble the mushrooms, have some melted milk chocolate and paint on the underside of the caps, drawing a toothpick through the chocolate to make gills. Then place stem into cavity of cap and let cool and set at room temperature. Dust caps slightly with cocoa for a realistic effect.

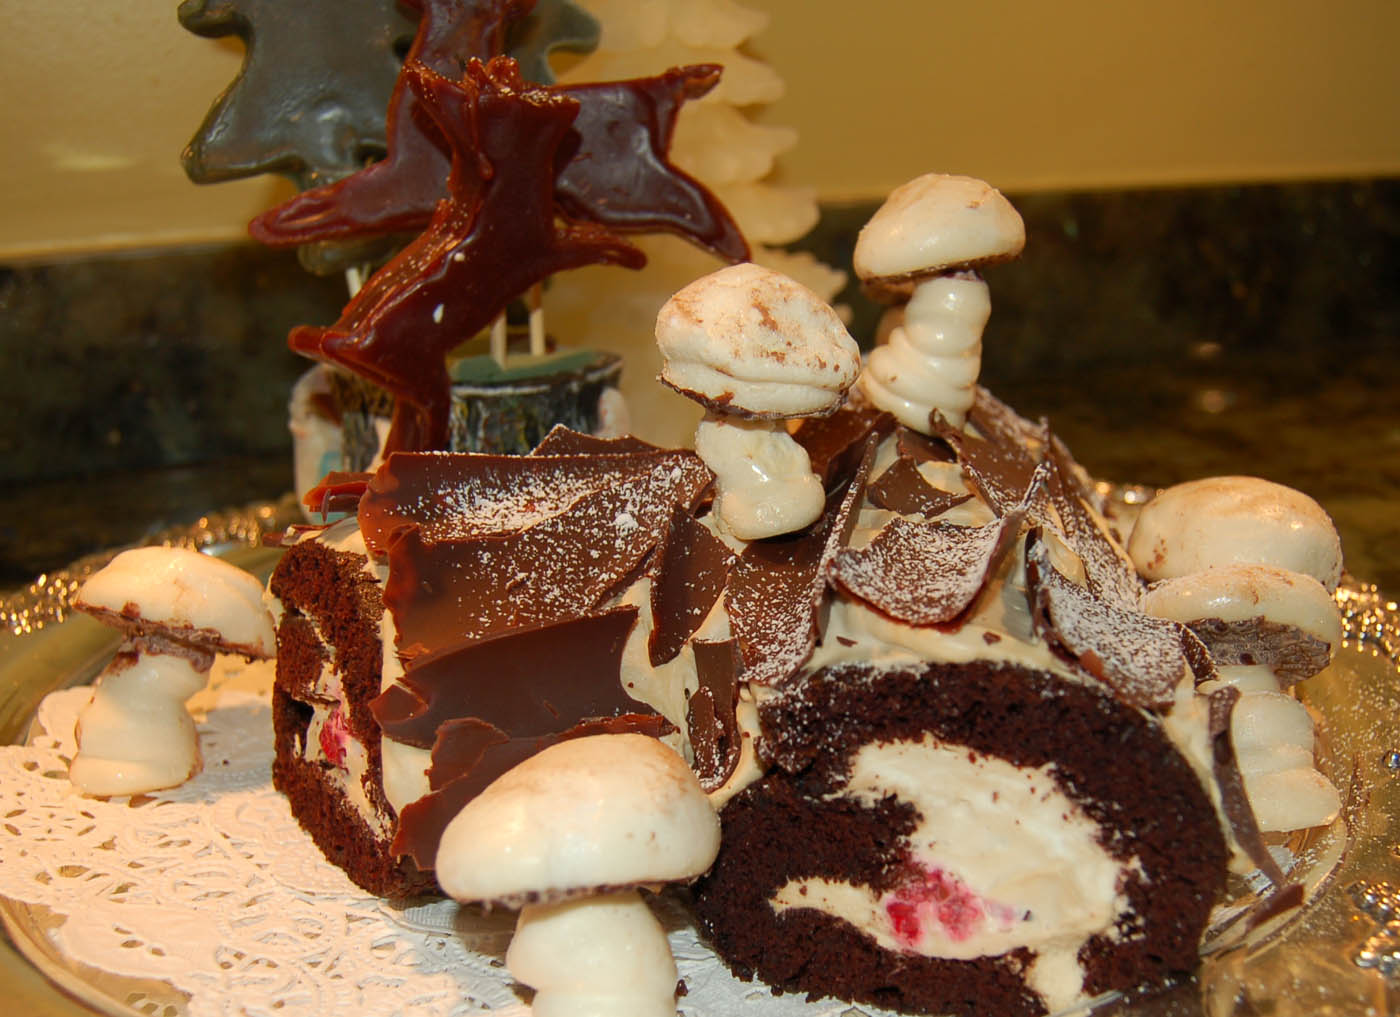
Arrange on a platter with mushrooms around and on top. I had some deer and tree candles in a cute little gnome log planter that went with the theme!


Seems like a lot of work, but if you make the mushrooms, the bark and the buttercream a day in advance, then all you have to do is bake the cake and decorate it. This cake is so delicious and will be a great centerpiece on your New Year’s Day table.

Rapunzel Rapunzel, a Gingerbread House Fairy Tale
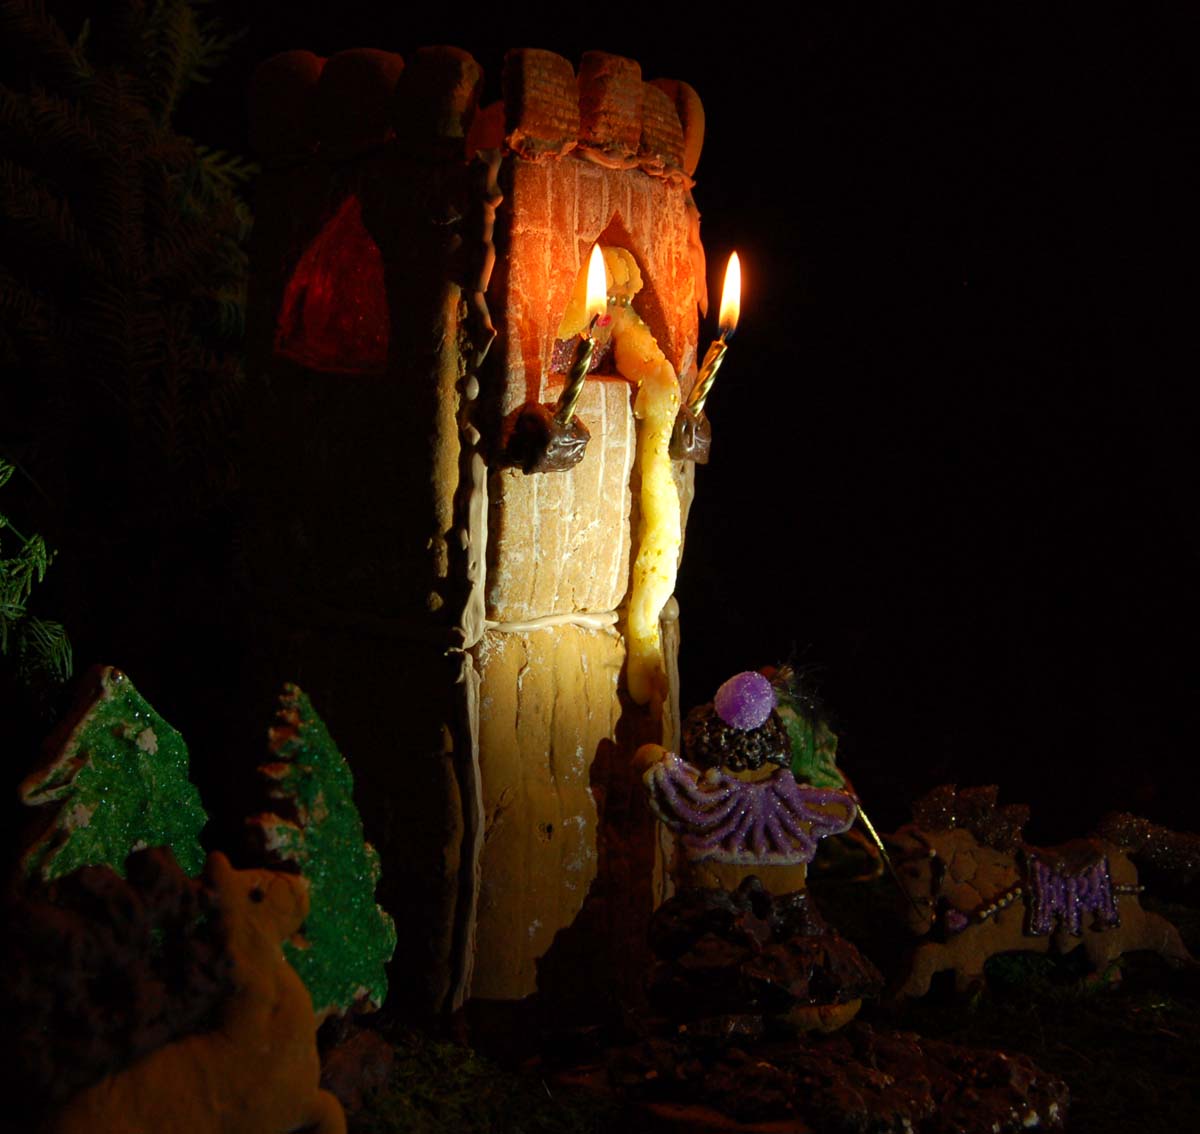
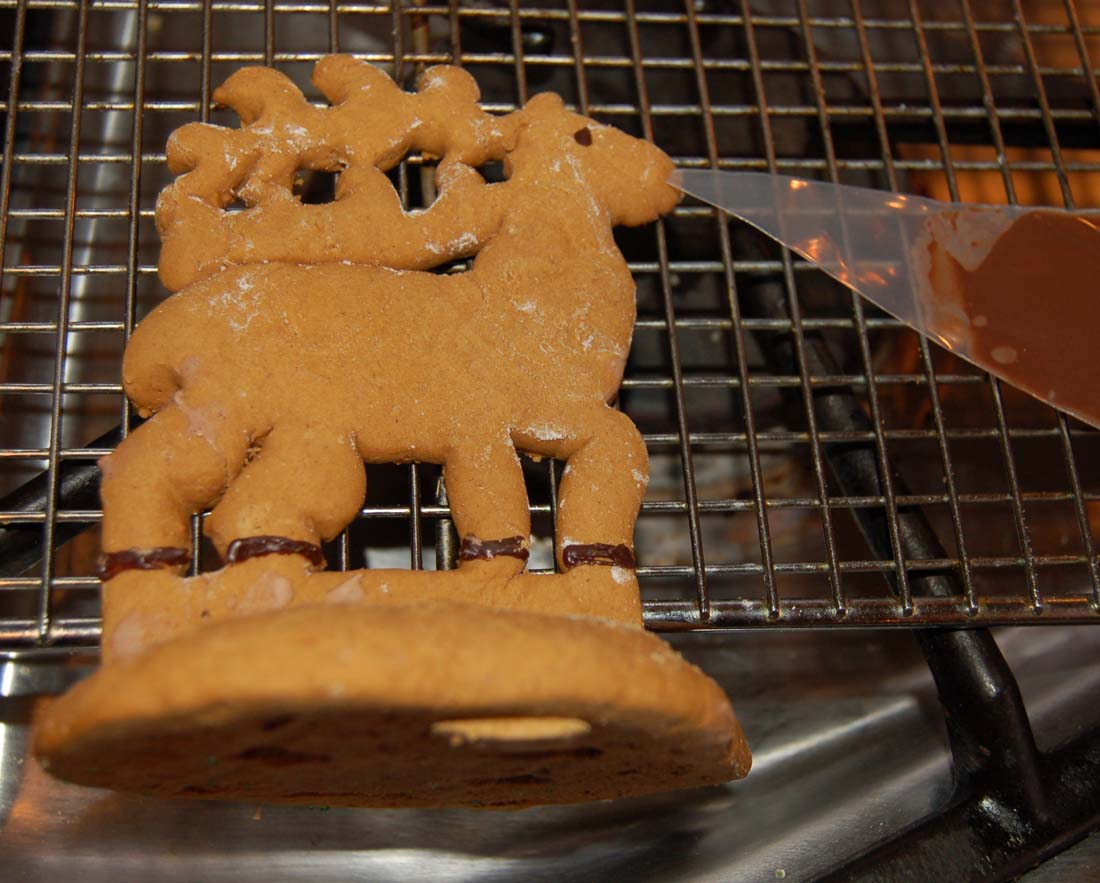
Once upon a time, in a deep dark enchanted forest of sparkling green trees, there lived a sweet buttery girl name Rapunzel. An evil and wicked witch had taken her as a baby and locked her away in a tall lonely gingery tower with only grape-cherry stained glass windows to give color to her day. She spent her time brushing her long golden marzipan scented locks and singing songs to the velvet chocolate deer and other animals below.
One sunny fine spring day a Prince who was riding by on his strong cinnamon steed fell in love with the fair maiden and after calling to her and seeing she was locked away in the door-less tower, promised to return that night to rescue her.
Rapunzel was very flattered by the handsome Prince and knew she wanted to go away with him to be his Princess. That night she lit all her tower candles to help him find his way through the forest.
When he finally arrived with a beautiful spring flower, he called up, “Rapunzel, Rapunzel let down your long hair!” and climbed on the chocolatey rocks. Rapunzel was delighted, and lowered her beautiful pale almond locks .
… And so they lived happily ever after in his kingdom, where sweet Rose Gingerbread cottages, jelly bean paths and candy topped castles filled the land.

I was inspired to enter my first Gingerbread house contest by Movitabeaucoup.com who has a contest on her fabulous blog every year. Okay I learned a lot about what will and won’t work with Gluten-free gingerbread “architectural” cookies ( so many of them broke as they didn’t get very firm, which delighted my boyfriend who kept asking when he could eat the broken pieces) and having to get creative about how to support the structures and keep the gingerbread animals and people upright for the display and photo shoot. It all started with a brainstorming and first drawing of what I had envisioned for my Rapunzel.

So the work started with creating all the pieces and cutting them out by hand and by cookie cutters and molds.


I figured out pretty quickly the tower pieces would need to be supported and used a rectangular cardboard box as a support with some wooden popsicle sticks stuck on to the backs.

Then the decorating fun began, with learning how to melt hard candies into the crevices of the window openings to create wonderful stained glass windows. It worked! Also made the house smell like grapes and cherries.


I used plenty of melted chocolate to decorate the house and the animals as I liked the natural matte look once it hardened up.
I really wanted this wonderful old tower to have real fire torches to light up the way at night and show the light through the beautiful stained glass windows… birthday candles did the trick!

The daylight photo shoot of Rapunzel meeting her prince:

I went inside for a moment while leaving the photo shoot set up in the garden and returned just in time to see a squirrel about to “visit” the enchanted forest for a taste of the life there.

What a fun time this last week was! I laughed a lot, cleaned the kitchen and floor about 40 times and learned moving slowly, having patience and being creative was pretty key to keeping the project moving forward.

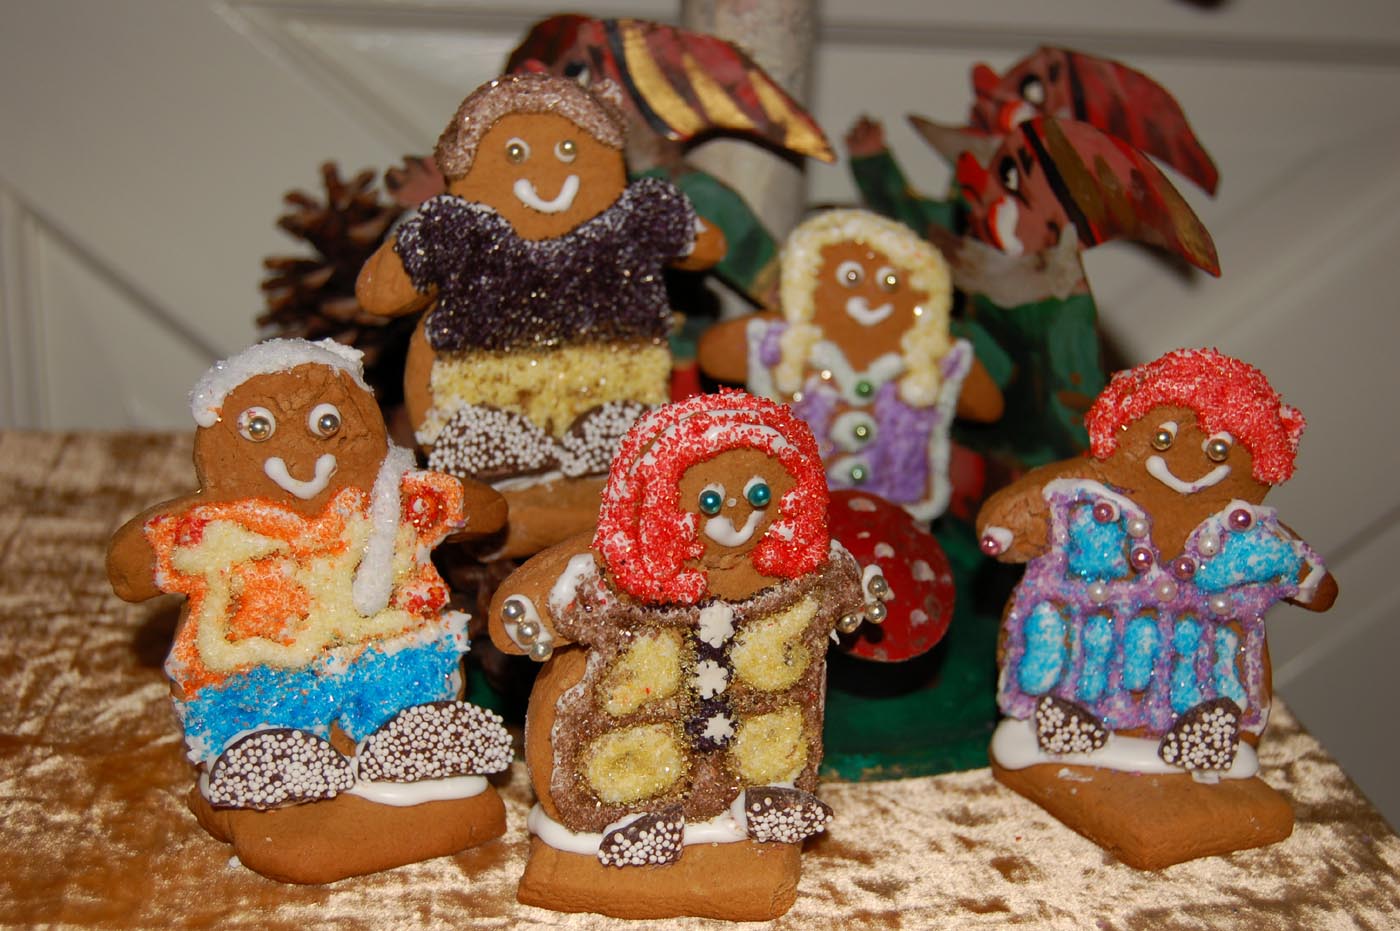
Gingerbread Place Cards – Whimsical Table Decoration
Gingerbread Place Cards – Whimsical Table Decoration
Last New Year’s Day I was thinking about place cards for our lunch celebration and wanted something more interesting than the regular folded gold cards I had in my crafts cabinet.
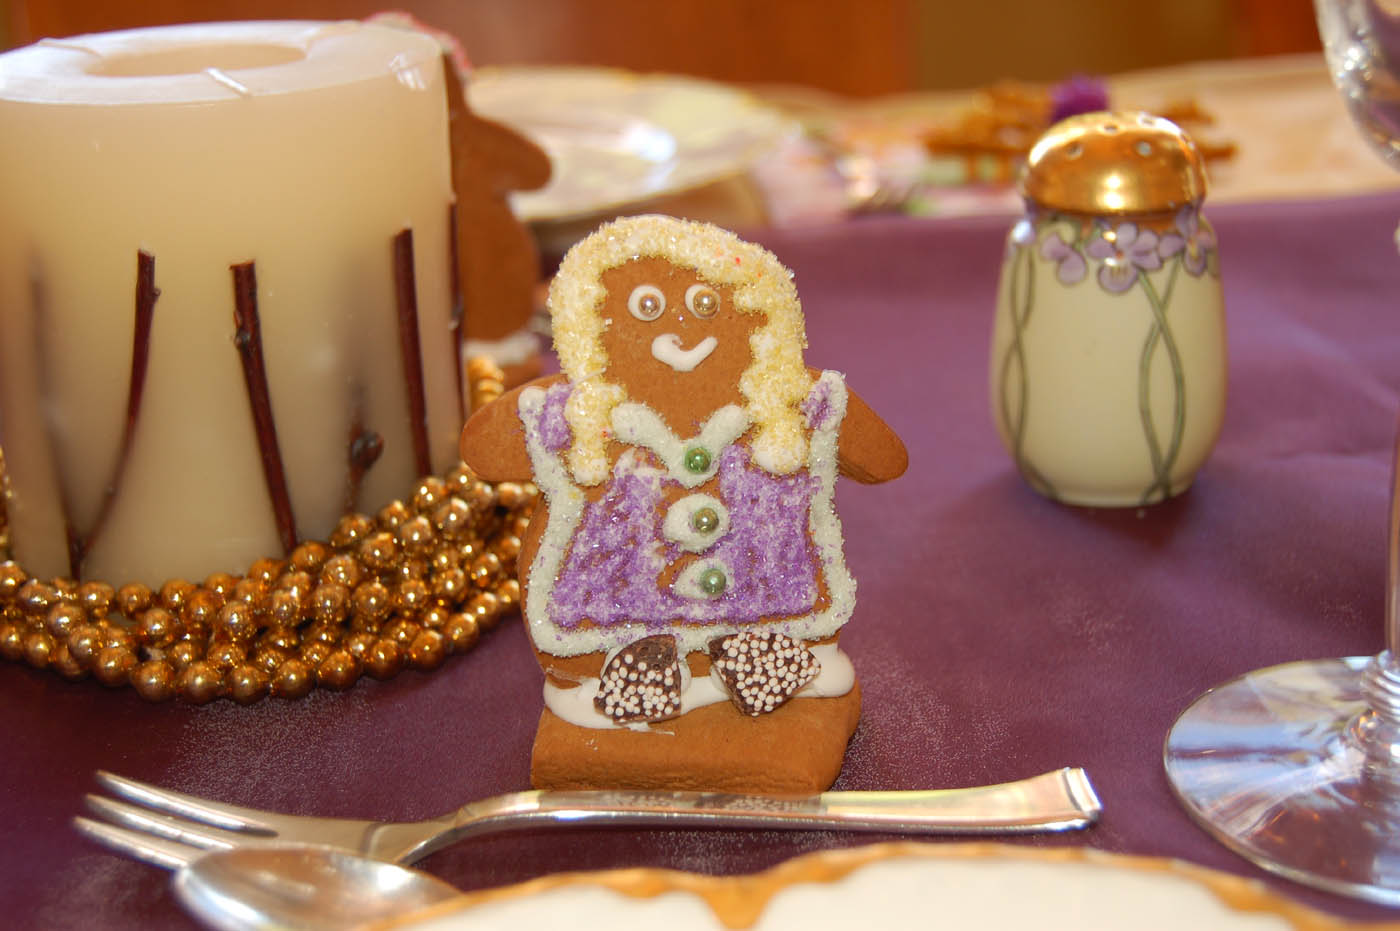
I remembered the Gingerbread House I baked last year so I created little gingerbread boys and girls and embellished them with colored sugar crystals and icing. The fun part is decorating them with the colored sugar, candies and nonpareils so they resembled each of the guests.

To start, find your favorite Gingerbread house recipe ( I used gluten-free) and royal icing ( is the “glue” for the cookie person to stick to the base and for the sugar and decorations to dry on to the cookie). If you need a good base recipe, here is a good link:
http://www.marthastewart.com/272117/gingerbread-house-recipes
Roll out the dough and use your favorite gingerbread man cookie cutter to cut out the shapes. Make sure to cut out square or round bases about 1/2″ wider than the cookie and bake until crisp ( use directions on your recipe) on a baking sheet. Remove to cooling rack. Make the Royal icing and put some in an icing bag or squeeze bottle for cake decorating with a small tip.
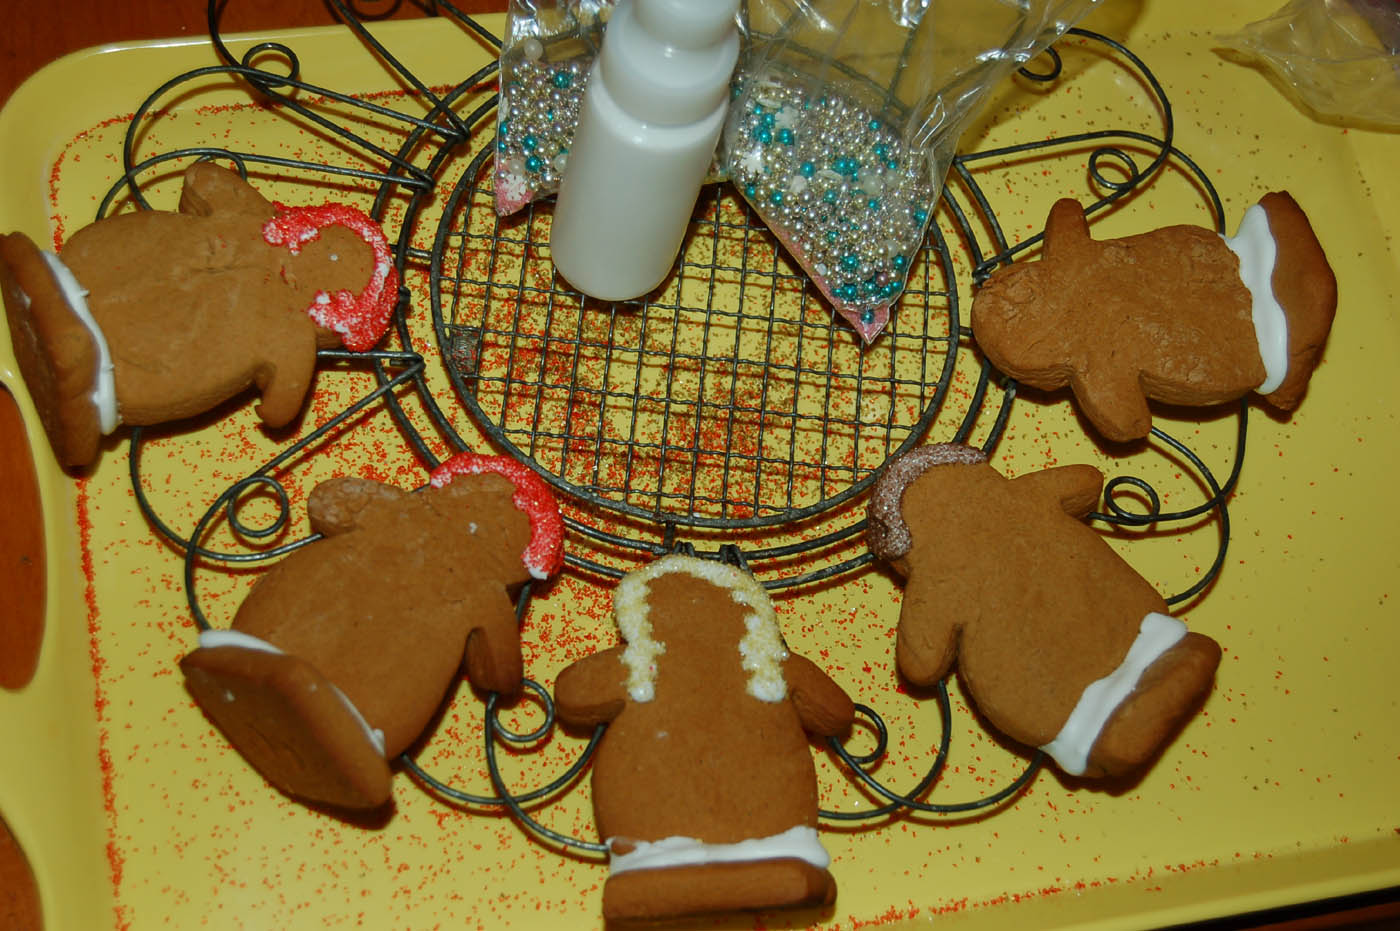
Once cookies are cool, use a dollop of icing on the base and position the cookie upright. You will need to lean it against something until it sets, about 30 minutes. When cookies are all set and it is time to decorate them, assemble all your decorating sugars and candies and place the cookies on a wire rack over a tray ( to catch the run off of the sugar and decorations).

Then start piping hair, clothes , eyes and any designs you want on the mini people cookies. I usually start with the hair, sprinkling the colored sugar on that, tapping off the excess into the tray below and letting it set slightly before moving on to another part. Repeat doing sections and letting them harden with their decorations so the different colors don’t blend together. Have fun with being creative, try shaved chocolate curls for hair,


sliced gumdrops for shoes, shiny edible metallic balls for eyes and jewelry. If you have a color scheme for your table, it would also be fun to use all those colors.


 If you have extra cookie dough, use your other cutouts and make some fun regular cookies with decoration.


Happy Holidays!


Scrumptious French Coconut Madeleine Cookies (Gluten Free)
SCRUMPTIOUS French Coconut Madeleine Cookies (Gluten Free)

These cute little sponge cakes called “Madeleines” have quite a history! In mid 1700’s France, King Louis XV was said to have called these shell shaped cookies Madeleines, after his Father-in-law’s cook. They are often lemon flavored and are the perfect pairing with tea as dunking the spongy center with it’s slightly crunchy edge makes a very satisfying snack. Every pastry shop in France offers these treats, some chocolate dipped, others with a ground nuts mixed into the sweet batter. Even Proust, in the 1920’s, wrote in his autobiography: “
She sent for one of those squat plump little cakes called “petites madeleines,” which look as though they had been molded in the fluted valve of a scallop shell … I raised to my lips a spoonful of the tea in which I had soaked a morsel of the cake. No sooner had the warm liquid mixed with the crumbs touched my palate than a shudder ran through me and I stopped, intent upon the extraordinary thing that was happening to me. An exquisite pleasure invaded my senses …
And suddenly the memory revealed itself. The taste was that of the little piece of madeleine which on Sunday mornings at Combray … when I went to say good morning to her in her bedroom, my aunt Leonie used to give me, dipping it first in her own cup of tea or tisane …. and the whole of Combray and its surroundings, taking shape and solidity, sprang into being, town and garden alike, from my cup of tea.“
Well who wouldn’t want to have a Madeleine after reading that!

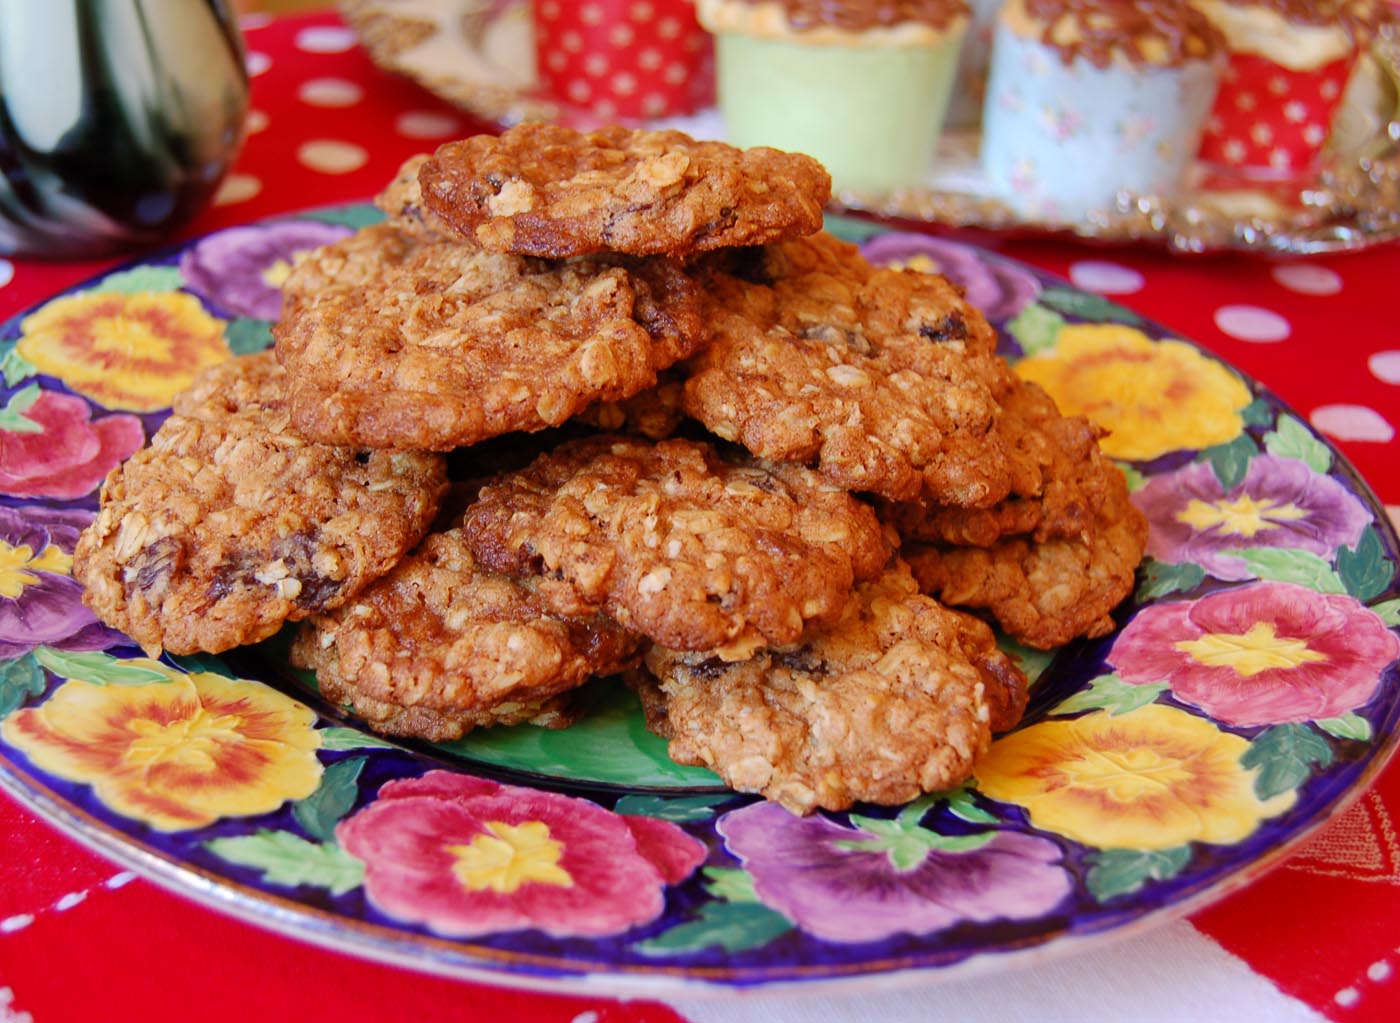
This wonderful recipe is inspired by my Mom’s cookies that she surprised us with last week. They are very simple to make, in one bowl and in 25 minutes you can have a warm stack of cookies to hand out.

Coconut Madeleine Cookies ( Gluten Free)
2 large Eggs
1/2 cup Sugar
1 teaspoon Vanilla extract
1 tablespoon Canola oil
1/2 cup Unsweetened Shredded Coconut
1/2 cup Authentic Foods Gluten Free CLASSIC MIX ( or brown rice flour blend without gums or raising agents)
http://authenticfoods.com/products/item/43/GF-Classical-Blend
Preheat oven to 325 degrees and spray Madeleine pan ( full size pans have 12 cookie molds, Mini Madeleine pans have more. This recipe makes 12 large cookies.
In a medium mixing bowl, whip eggs with sugar for 3-4 minutes. Add in Vanilla and oil and mix well. Stir in Coconut and brown rice flour and mix just until fully blended.
Spoon batter into the 12 molds on the Madeleine pan. Bake 15-18 minutes until golden brown on top.
Remove from oven and turn out cookies to cool on rack. Dust with sugar and serve or dip in melted chocolate and let harden for an hour.


A beloved PANSY for your thoughts…
A Beloved Pansy For Your Thoughts…..

As a wildflower that was first noticed in the 1400’s, this cheerful little flower became the most popular flower in the world by the mid 1800’s when many color varieties had been developed from its parent flower, the Viola. Their name in French, “Pensee”, means Loving Thought, and if a lover was near (and a bouquet of pansies were as well), the lovers could communicate without talking. The German name for these cute flowers with their human-like expressions is Little Stepmother or “Stiefmütterchen”, from an old folk story.
They appeared in Shakespeare’s plays as ingredients in love potions, and on Art Nouveau and Victorian era postcards to forward the senders thoughts and well wishes.


Pansy themed pottery and china was very popular in the Victorian and Art Nouveau eras. Look for vintage pieces at garage sales and antique stores – they make wonderfully whimisical serving pieces. Adorn your cake or tart with candied fresh pansies from your garden.


Here is an example of a c.1890’s Celluloid Photo Album with a pansy design.

They are one of my favorite flowers! They thrive all fall and winter here in Southern California and only finish blooming in the hot start of summer. They are very easy to grow and thrive in sun, part sun and sometimes a bit of shade. They just need water, fertilizer and some removal of the spent heads.

They will just keep on blooming.
Here is an antique Carlsbad Oyster Dish with a fabulous Pansy motif:

And a hand painted c.1900 German cup and saucer:

They make darling bouquets and sweet arrangements for your tiny vases but a big impact with their color and sunny personality! * * *


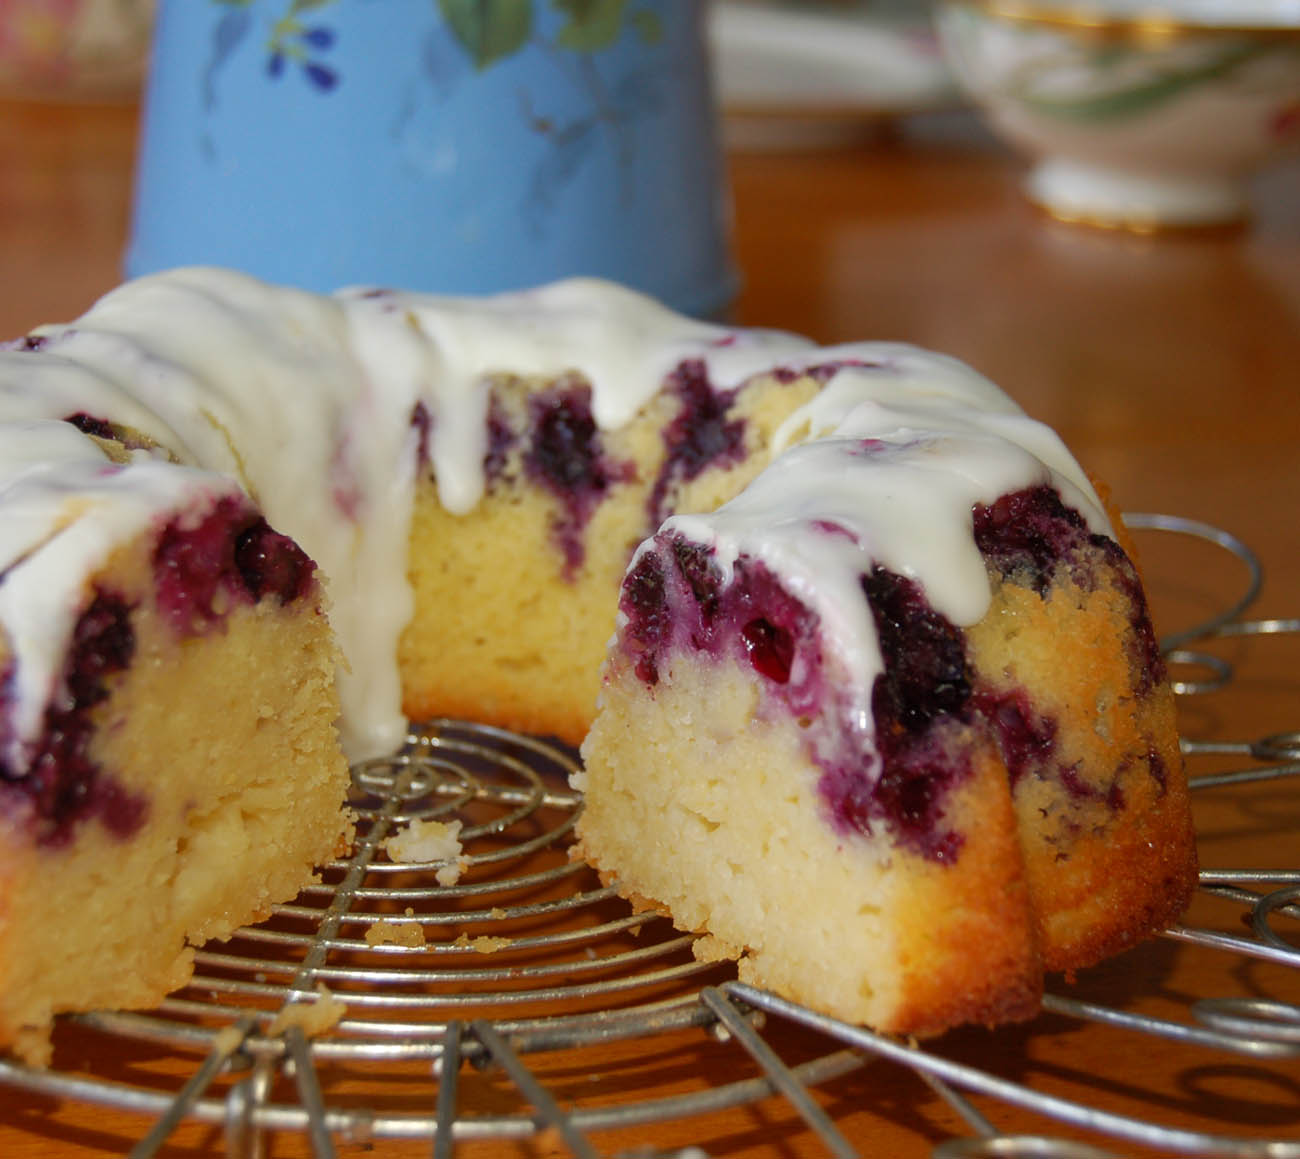
Ode to a Lemon … Gluten free LEMON BLUEBERRY CAKE
Ode to a Lemon … GLUTEN FREE LEMON BLUEBERRY CAKE !
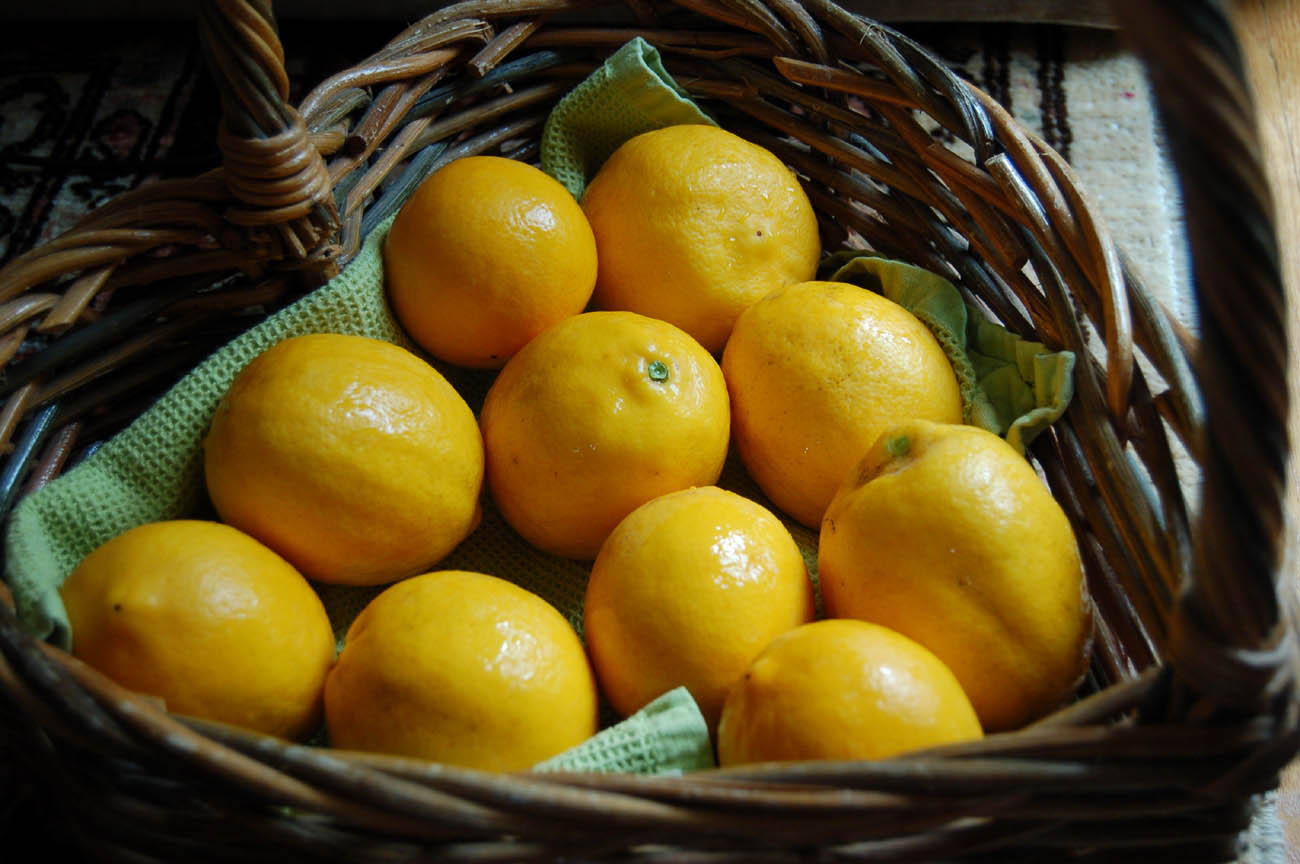
Lemon appreciation started early for me. As a young child my favorite color was YELLOW. Not the pale yellow you see in frostings or greenish-hued yellow of sandwich mustard. Pure, true LEMON yellow was my color of choice. Did it start from enjoying my Mom’s mouth watering Lemon Meringue pies and cups …

or velvety smooth lemon pound cake, both which were my favorite desserts? I wouldn’t be surprised! Which came first … the chicken or the …? In any case the sunny brightness of lemons always makes me happy, and the tart fruity taste a wecome addition to many desserts that I enjoy baking.
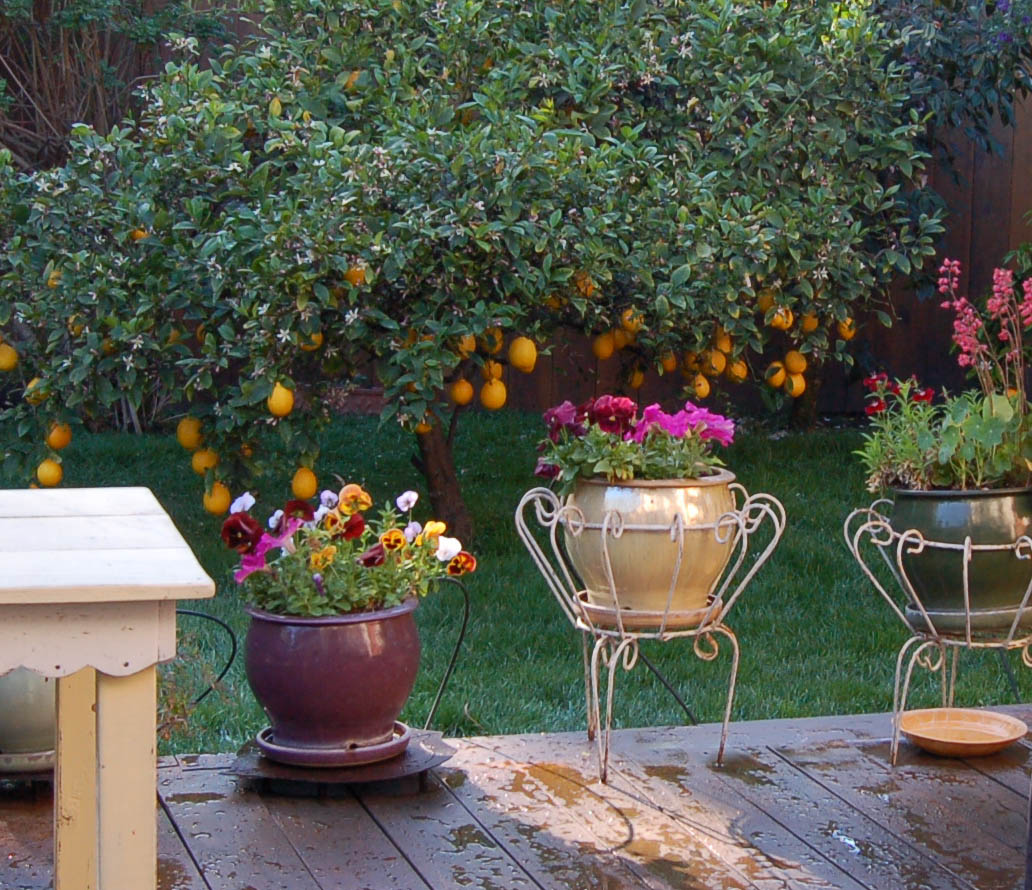
In my California garden I am lucky to have both a Meyer Lemon tree (cross between a lemon and a mandarin or orange) and the regular Eureka (sour) lemon tree. I prefer the Meyer lemon when using the juice only and the Eureka lemon if I need to grate the rind, as it has a more pure lemon taste.
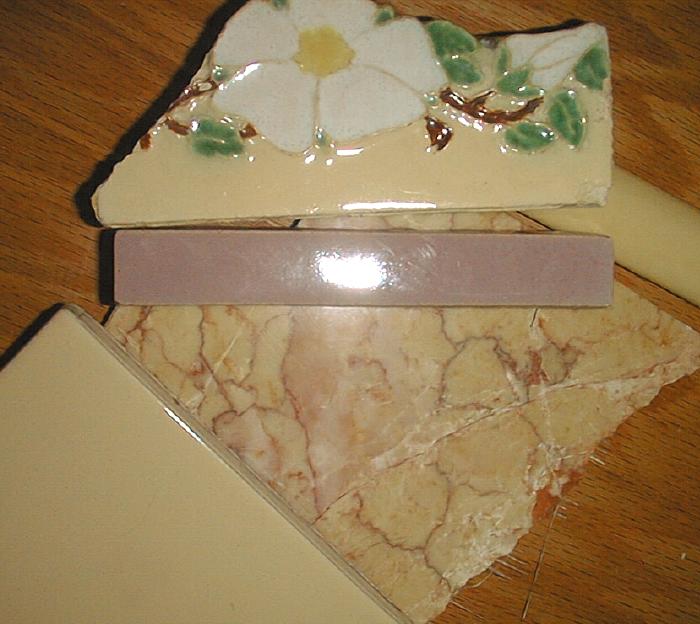
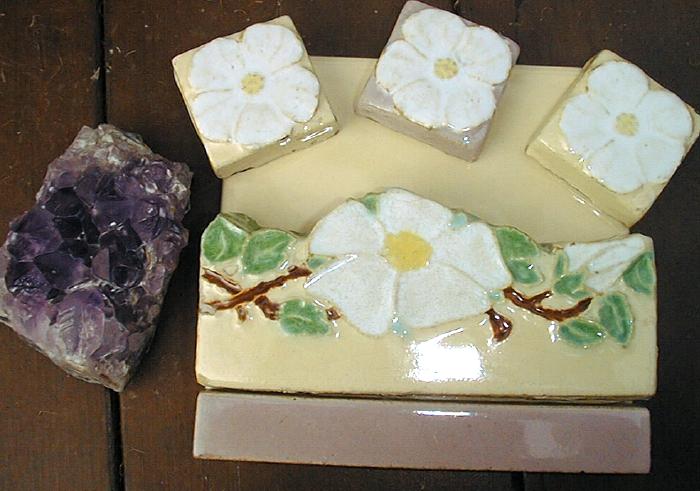
Yellow has also found its way into my home decor with soft yellow walls in the bathroom , a wonderful yellow Spanish Marble floor and counters and some truely perfect c.1929 butter yellow Malibu Potteries flower tiles as accents. So uplifting.
It doesn’t surprise me that our dear family friend, Pat, who passed away last weekend after a very long and full life, chose to give me what turns out to be just up my alley in the form of two amazing antique majolica lemon towers which I will cherish.

Back to Lemon Recipes. This cake or bread recipe is wonderfully moist and flavorful. Good enough for a birthday party or as an afternoon treat with coffee or tea.
Lemon Blueberry Cake
Ingredients:
1-1/3 cups gluten-free flour (Authentic Foods CLASSIC blend)
2 tsp baking powder
1 cup plain whole-milk yogurt
3/4 cup sugar
3 large eggs
2 tsp grated lemon zest (2 lemons)
1/2 tsp vanilla extract
1/4 cup vegetable oil (or canola oil)
1 cup fresh firm blueberries ( one small container)
Lemon SYRUP:
¼ cup fresh squeezed lemon juice ( strained)
¼ cup sugar
For the glaze
1 cup powdered sugar
1 tbsp lemon juice
1 tablespoon cream
Steps:
(1) Preheat oven to 350 F. Grease and flour loaf pan or bundt cake pan.
(2) Sift together flour, baking powder into medium sized bowl. Set aside.
(3) In a large bowl, whisk together yogurt, 3/4 cup sugar, eggs, lemon zest, oil, and vanilla.
(4) Slowly add dry ingredients to wet mixture.
(5) Mix in blueberries
(6) Bake for about 50 minutes, or until knife in center of cake comes out clean and top is deep brown.
(7) While cake is baking, make the lemon syrup: cook 1/4 cup lemon juice + 1/4 cup sugar in a small pan until the sugar dissolves and the mixture is clear.
(8) Remove cake from oven and while still in pan poke a few holes with a wooden skewer all over the cake bottom. Brush lemon-sugar mixture over the cake and allow it to soak in. Turn cake over onto plate or cooling rack.
(9) For the glaze, mix powdered sugar, cream and lemon juice until thick. Pour over the cooled cake.


SPICY CHICKEN PAPRIKASH – a Delicious Gluten Free Hungarian Paprika Stew
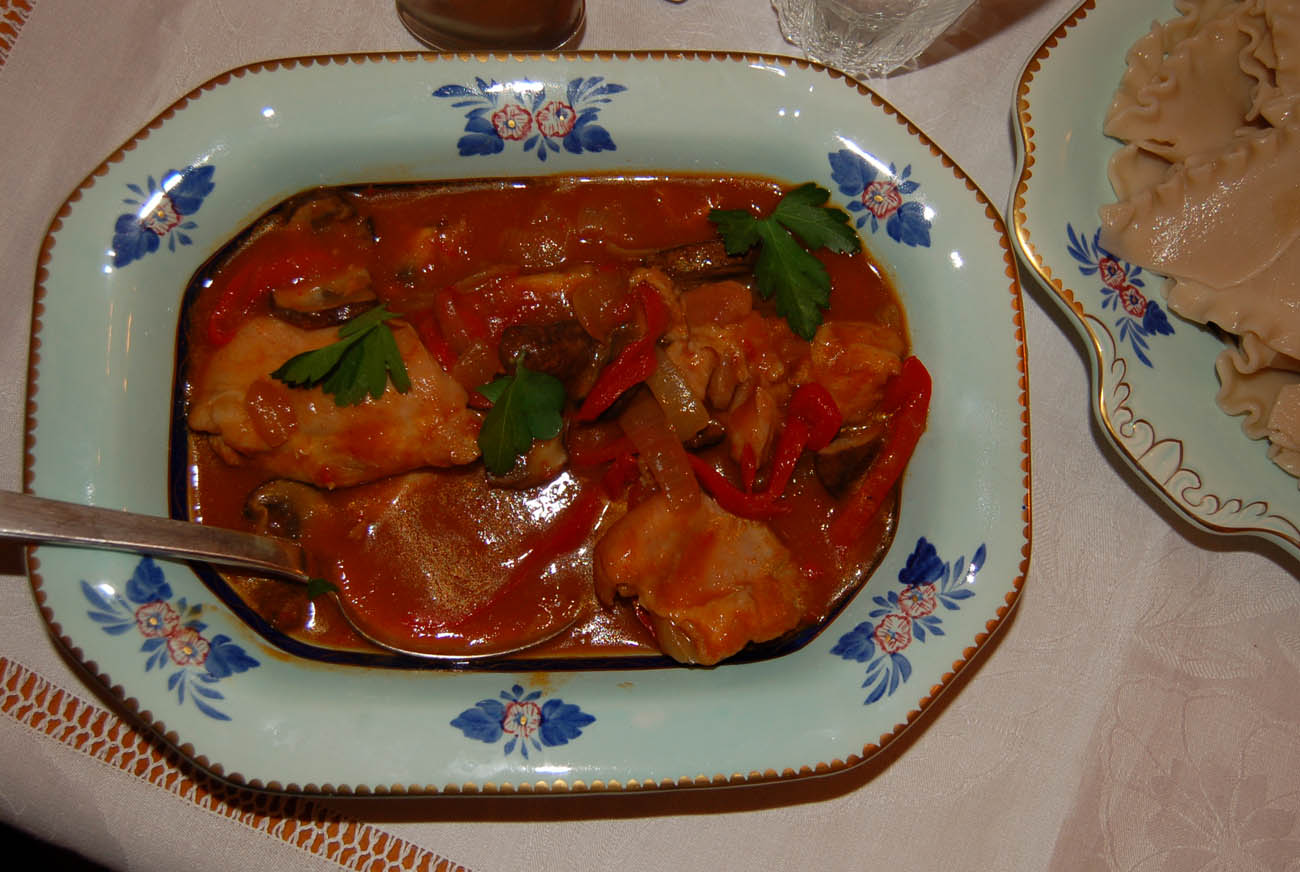
SPICY CHICKEN PAPRIKASH – a Delicious Gluten Free Hungarian Paprika Stew
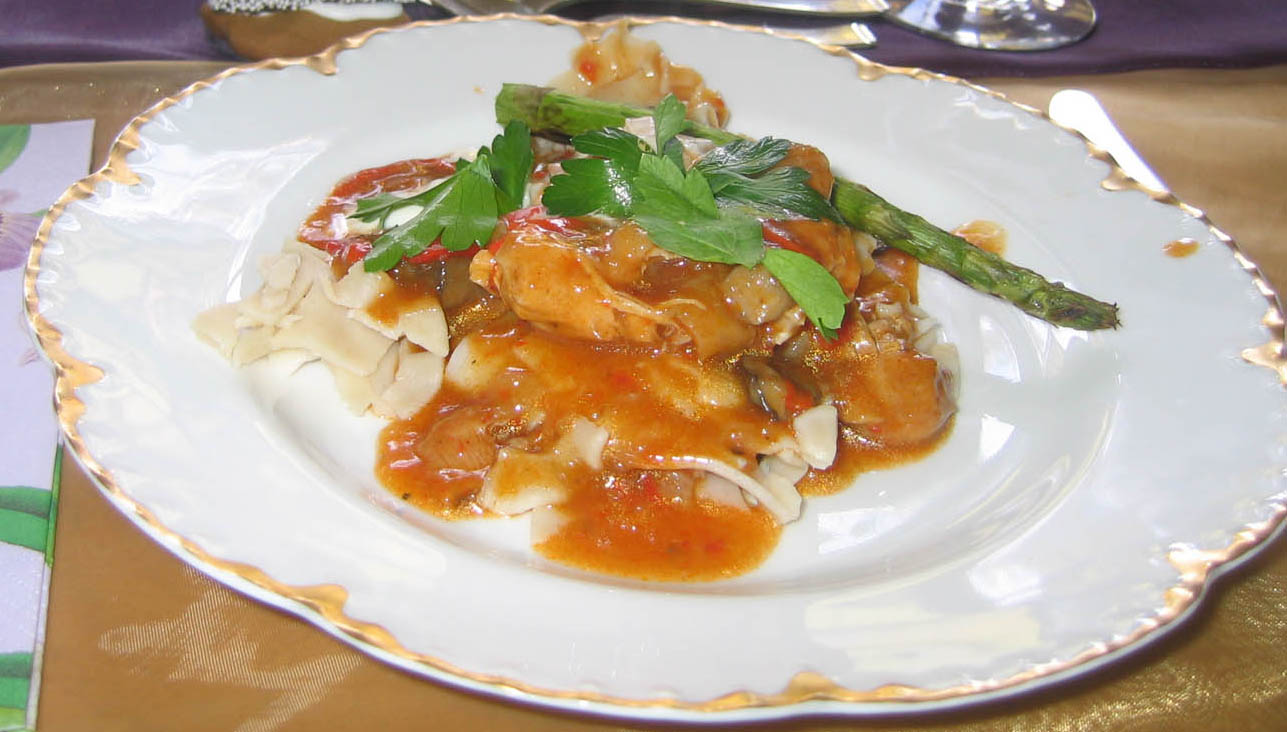
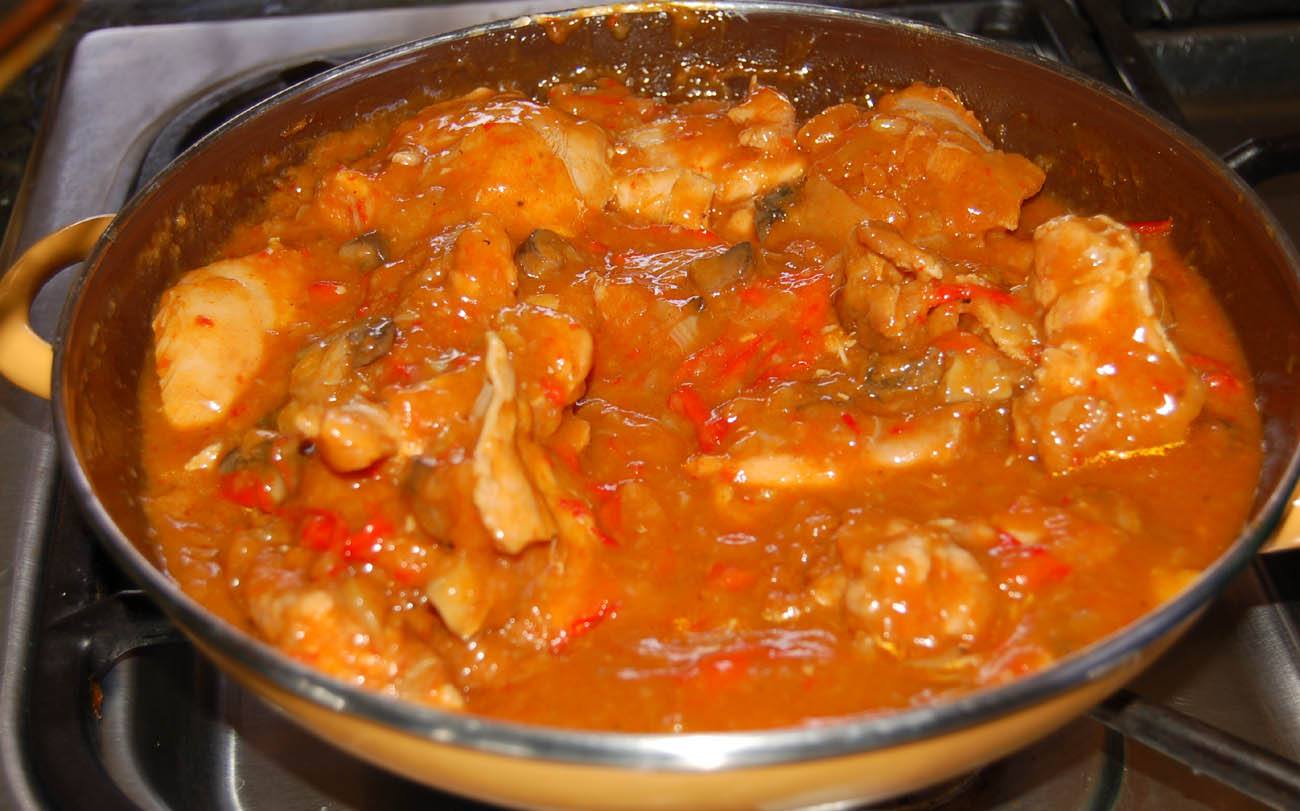
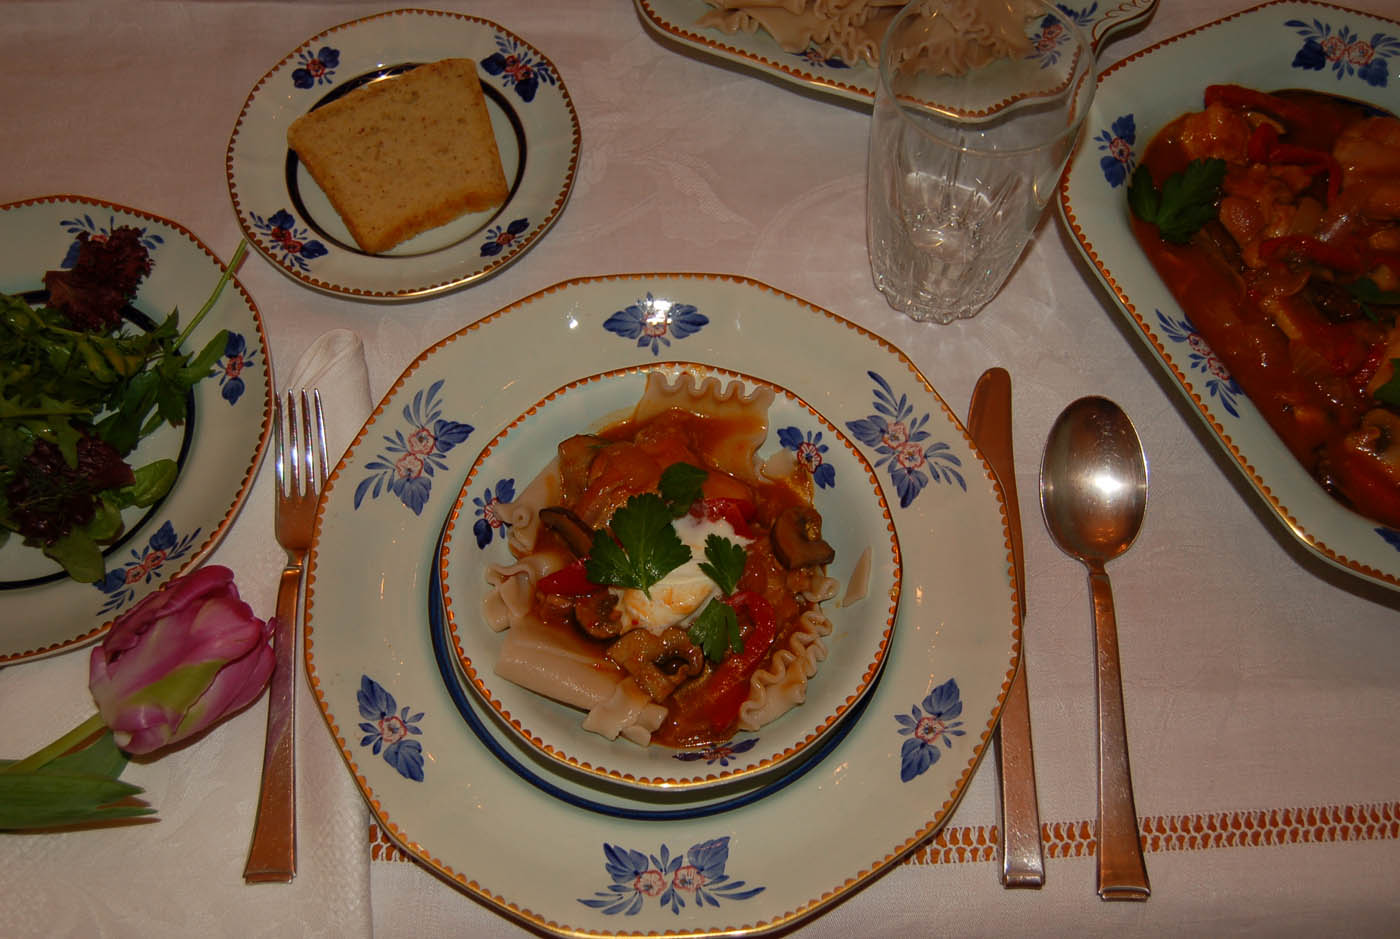
A classic dish in Hungarian cooking, this elegant stew can be seasoned to your taste by adjusting the amount of spicy and sweet red paprika powder that you add. A perfect hot creamy chicken and healthy dish to serve over noodles this winter, this recipe just keeps getting better on the second and third day. This dish is full of bright fresh bell peppers, which are blended with the onions after cooking to make a creamy and colorful sauce, something that was missing in other recipes I tried. There were plenty of compliments when I served it for New Year’s Day lunch this year!
If you don’t need to prepare it gluten-free, simply use regular flour to coat the chicken pieces and regular lasagna noodles.
SPICY CHICKEN PAPRIKASH RECIPE
2 – 3 tablespoons Garlic Olive Oil ( or add 2 cloves minced fresh Garlic to Olive oil)
1/2 cup gluten free ( or regular) Flour – Authentic Foods Classic Flour blend is recommended
1 to 1 1/2 lb boneless skinless Chicken thighs or chicken breast cut into large bite-size chunks
1 large Brown Onions, thinly sliced
2 large Red Bell Peppers thinly sliced
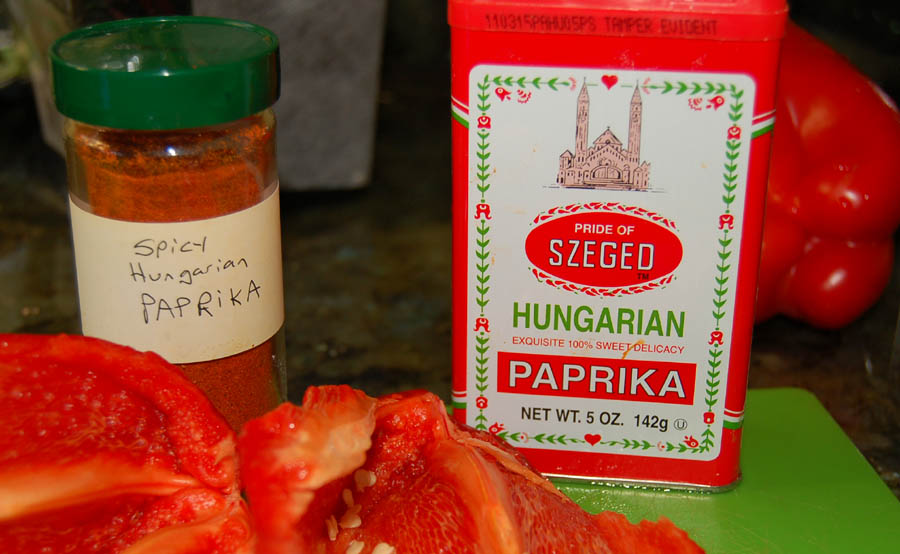
1 teaspoon Spicy Paprika powder ( try Penzey’s version) or to taste
1 Tablespoon Sweet Paprika powder ( Szeged is the hungarian brand available in grocery stores) or to taste
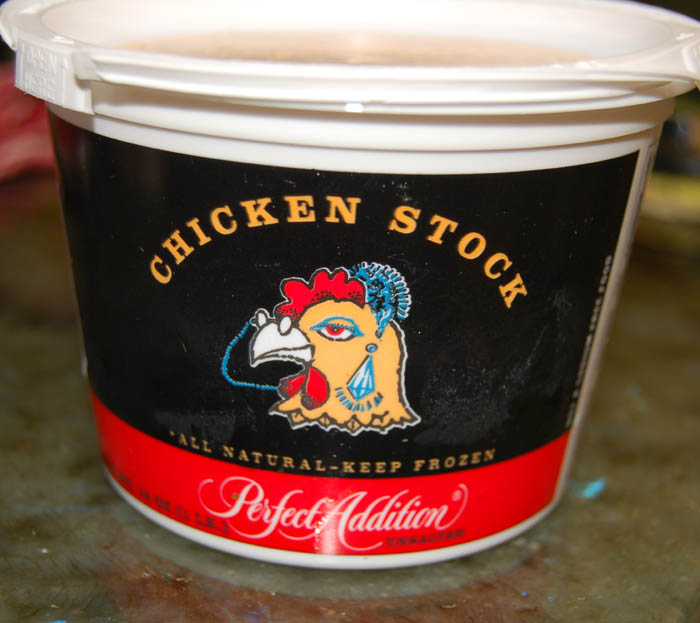
2 cups low sodium Chicken Broth
8 ounces sliced Cremini mushrooms sauteed in 2 teaspoons olive oil
2-3 tablespoons cornstarch mixed in 1/4 cup cold water ( for thickening)
Salt and Pepper to taste
1 box gluten free Lasagna noodles, broken in half and then cooked, drained and kept warm
dollops of Cream Fraiche or plain yogurt as topping
Italian Parsley for garnish
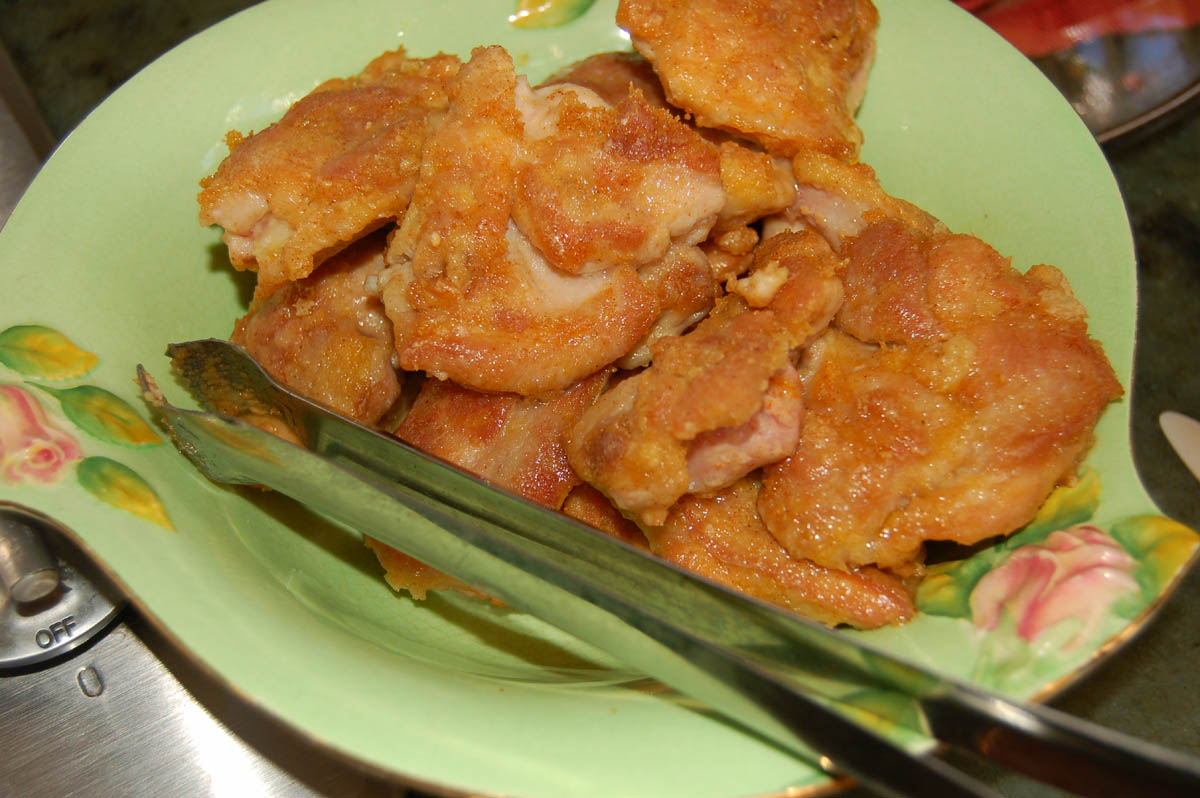
In a large sauce pan, heat olive oil and garlic and saute for 3 minutes. Coat chicken pieces in flour and cook in hot oil for 4 minutes on each side, until golden. You will have to do two batches. Remove chicken pieces and reserve on a plate.
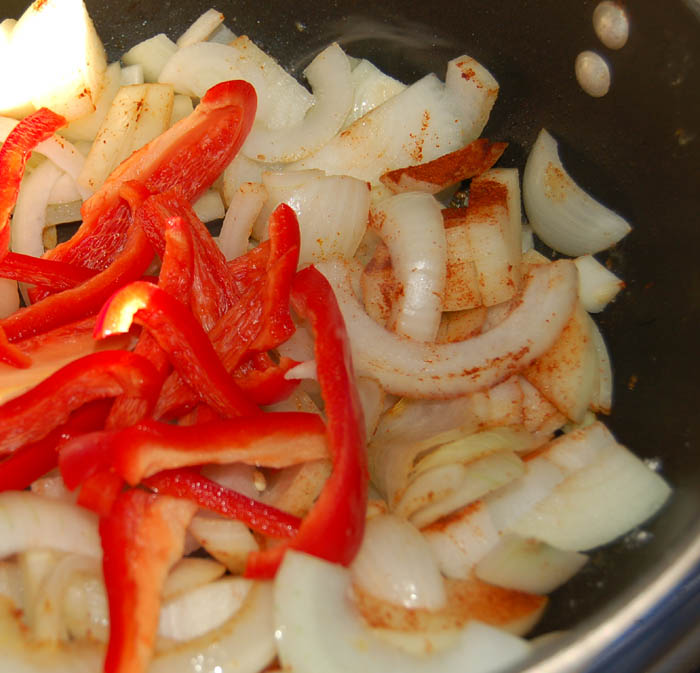
To the same sauce pan, add sliced onions, peppers and both kinds of paprika and saute until soft.
Take about 2/3 of the onion paprika mixture and puree in blender or food processer and add back to pan.
Add in sauted mushrooms, chicken broth and reserved chicken pieces and simmer with lid partially on for 30 minutes.
While the Paprikash is simmering, cook the Lasagna noodles .
Season paprikash mixture to taste with salt , pepper and more paprika if desired. To thicken the stew, pour in cornstarch mixed in cold water and stir while simmering. Mixture should thicken slightly.

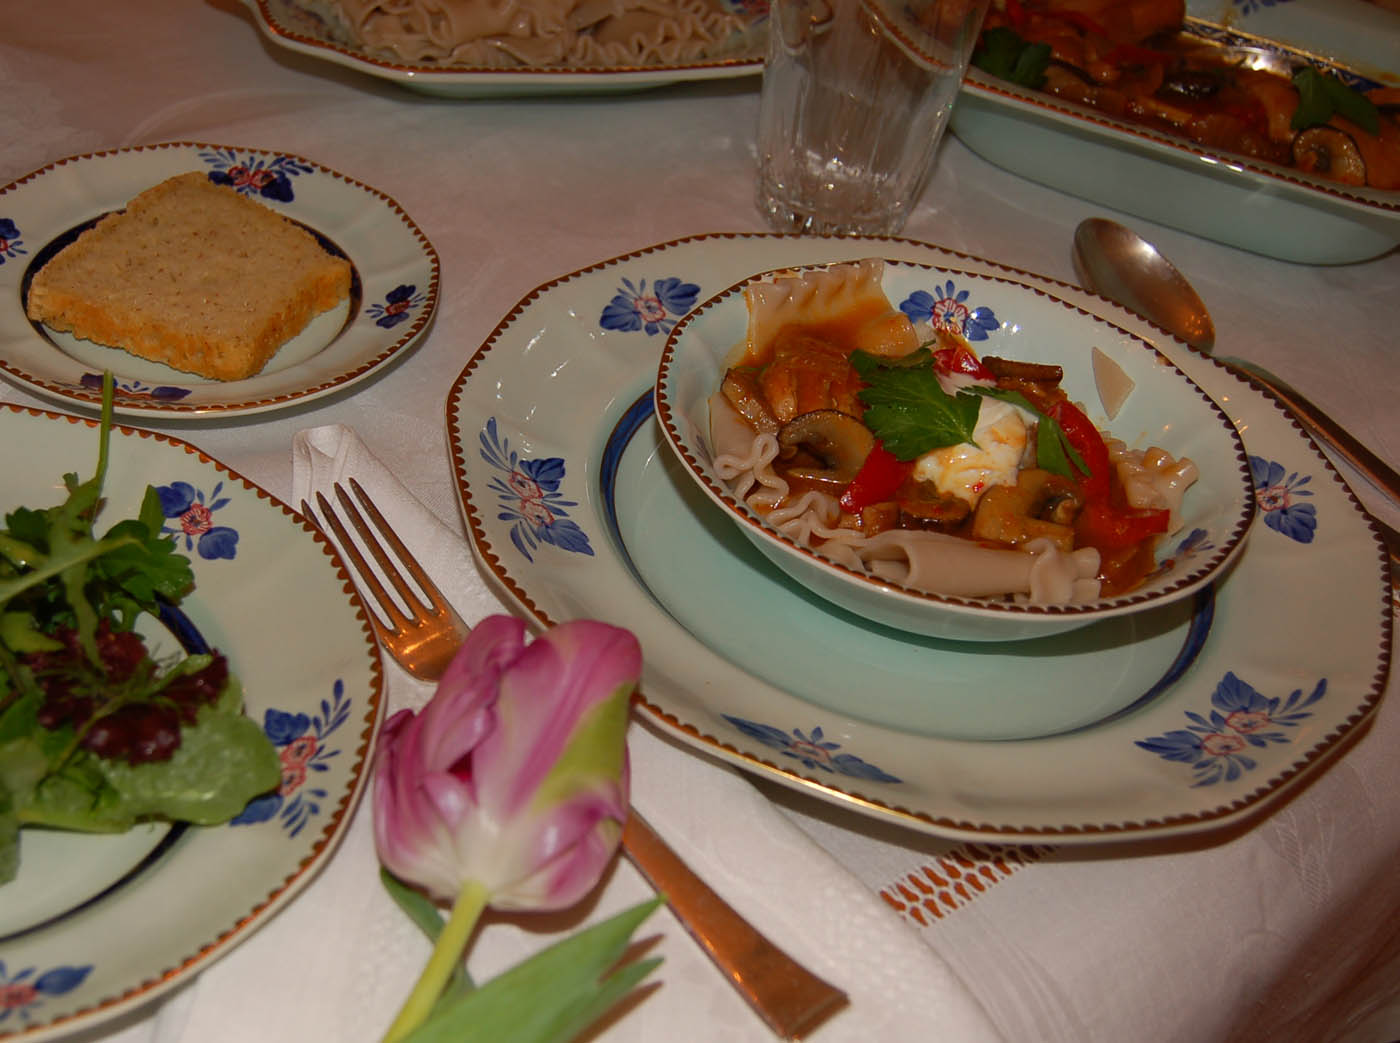
Serve over hot noodles with dollops of creme fraiche or yogurt, parsley and a side salad.
